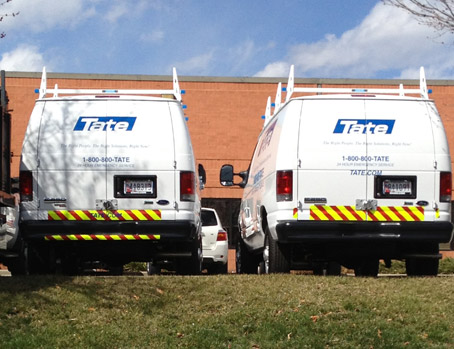
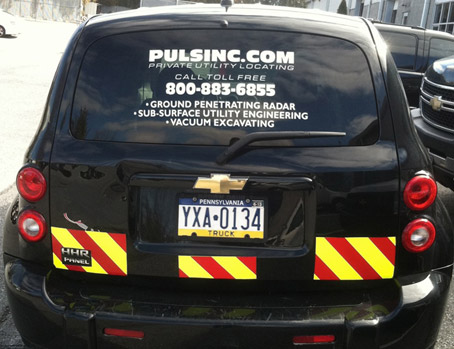
Vehicles that make frequent stops in or around moving traffic are especially susceptible to accidents.
Reflective yellow and red tape with an angled pattern is designed to increase visibility of commercial
vehicles. Material is made from superior polymers with improved reflectivity. The decal can be applied
to any vehicle to increase the visibility and reduce the risk of collisions.
Features:
- Waterproof
- Easy to apply
- Long lasting
- Standard and Custom sized stickers available
Benefits:
- Improves vehicle visibility both day and night
- Reduces workman’s comp claims and costs
- Reduces vehicle repairs and down time caused by accidents
- Eliminates business disruptions caused by accidents
- Provides insurance savings by lowering Total Incident Rate (TIR)
Use as is (6" X 48" standard strip) or easily cut/trimmed to fit anywhere.


All strips display angled red and yellow stripes, priced at $39.95 plus shipping and handling.
Custom widths and lengths available- call for pricing.
To Order Call 410-336-3160 or Email
info@visibilitytape.com
How to Apply Visibility Tape:
Adhesive performance depends entirely on surface preparation. Adhesive products should only be installed when it is dry outside. Applications should not be attempted when it is rainy or when dew is forming on the ground or other surfaces. A dry sunny day is optimal. Air temperature should be between 32 and 100 degrees and room temperature is optimum. Never attempt to apply reflective tape in sub freezing temperatures and do not expose the tape to sub freezing temperatures until it has cured for at least 48 hours.
Clean the Surface
- The surface that the tape will be applied to must be clean, dry and free of any contaminants such as dirt, grease, oil, etc. Hand washing the application area will accomplish this.
- To insure that the area is clean, a rag soaked in isopropyl alcohol should be used to wipe down the surface. Before the alcohol dries, wipe it down again with a separate dry rag or paper towel. This will also help to dry the surface.
Applying the Material
- Peel the backing off the material as you apply. Do not peel off more than you can work with at one time. Also, avoid touching the adhesive side of the tape as this can contaminate the adhesive and reduce its effectiveness.
- Lay the material down using your fingers to press it onto the surface. Try to avoid laying the tape down and then pulling it up and laying it down again as this tends to damage the adhesive.
- Using a squeegee or similar object, squeegee the tape down to the surface. Gently at first and then with more pressure, wrap the squeegee in cloth if necessary to keep from scratching the material. If a squeegee is not available use a cloth to press the tape firmly to the surface.
- Cut the material with a razor blade at any seams or joints in the surface that you are applying to.
- Go over rivets and then after application cut around the rivets with a razor blade or exacto knife so that the material lies flat all the way around the rivet. For larger objects we suggest you cut the tape and start and stop it on both sides of the object.
- If you go around a sharp corner, cut the tape and begin a new piece around the corner. The edges of the tape should be kept about ¼” from the edge of the surface that you are working on. If you bend the tape around a sharp corner it will stick at first but will eventually come up.
- When more than one piece of tape is needed to form a continuous line, it is recommended that you butt splice the material instead of overlapping it.
Suggestions
- Using 2 people makes the application process much easier.
- Make cuts to the tape prior to peeling back off when possible. (Length and Width)
- Use a sharp heavy duty scissors to avoid tearing the tape.